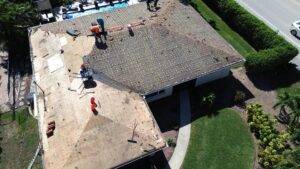
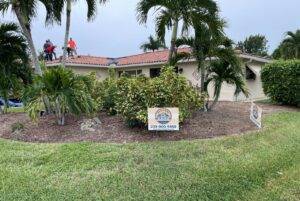
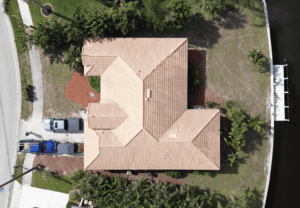
Planning a tile roof replacement Florida is a major investment — and one that’s easy to get wrong if you’re not careful. A good-looking tile job can hide serious problems underneath. The truth is, tile isn’t your home’s primary line of defense. What really protects your roof system is the underlayment, flashing, and how water is directed across and off the structure.
As a licensed Florida roofing contractor, I’ve inspected more tile roofs than I can count. The most frustrating part? Some of the worst problems I find are on newer roofs. That’s because many homeowners assume their roofer is following code — but in Florida, I’ve seen plenty of rushed jobs, ignored specifications, and even knowingly skipped steps.
This post will walk you through the key code requirements and best practices every Florida homeowner should understand before signing off on a tile roof replacement. If your contractor misses these, it can lead to leaks, mold, insurance headaches, and even code violations that hurt your resale value.
1. Tile Roofs Are Water-Shedding, Not Waterproof

One of the most common misconceptions is that concrete or clay tiles alone keep water out. They don’t. Tile systems are designed to shed water, not seal it out. That’s why the layers underneath matter so much.
Tiles provide UV protection and help redirect water, but Florida’s heavy rains and wind-driven storms mean that the roof must function as a full water-management system. The tile is the outer armor, but the underlayment is the true shield.
Homeowner Tip: Never agree to a “tile-only” replacement without confirming what’s happening under the tile.
2. Underlayment: Your First Line of Defense
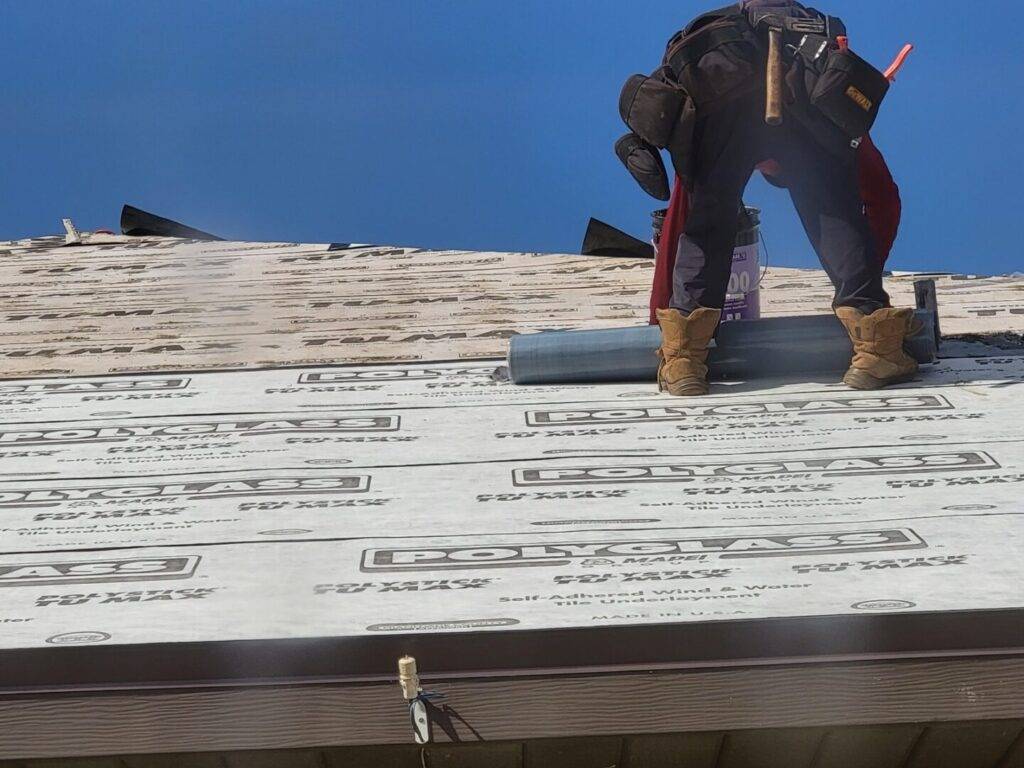
Code References: FBC-Residential R905.1.1.2, R905.3.3
Underlayment is where a lot of roof failures start. Florida Building Code requires either a two-layer underlayment system (mechanically fastened base sheet plus self-adhered cap sheet) or an approved high-performance synthetic system that meets the same performance criteria.
In areas like dead valleys, where water sits or flows slowly, your roof needs even stronger waterproofing. That typically means granular cap sheet or modified bitumen membrane — both of which are designed to handle ponding.
Watch Out For:
- Peel-and-stick installed directly on the roof deck with no mechanically fastened base layer
- Roofers applying peel-and-stick over old underlayment without removing debris
- No granule-surfaced cap sheet in low-slope or dead valley zones
Why It Matters: Improper underlayment won’t be visible once the tile is installed, but it can cause leaks that are hard to trace until the damage is severe.
3. Dead Valleys Must Be Treated Like Flat Roofs

Code References: FBC-R R903.2.1, R905.3.2
A “dead valley” is any area where two roof slopes converge in a way that slows down or traps water. These are inherently prone to leaks if not treated with care.
Tiles are not allowed on slopes less than 2.5:12. That includes many dead valleys, where slope is minimal. These areas must be treated as flat roofs and covered with a properly adhered waterproof membrane.
Best Practice: Use a torch-applied or self-adhered modified bitumen, followed by open valley flashing or trim tile for aesthetics.
Red Flag: If a roofer lays tile directly in a dead valley without using flat roof waterproofing, that’s a violation — and a future leak waiting to happen.
4. Flashing: Every Edge, Transition, and Wall Must Be Addressed
Code References: FBC-R R903.2, R903.2.1, R905.3.8
Flashing is the unsung hero of a tile roof. These metal components seal all the places where water might sneak in: at edges, valleys, walls, and penetrations.
Here are the essential flashings you should verify during install:
- Drip Edge Flashing at all eaves and rakes [R905.3.8] to guide water off the fascia or into gutters
- Gable End Flashing (Rake Edge Metal) to protect exposed rake tile and prevent wind uplift
- Trim Lock Ridge Flashing elevated properly and mechanically fastened without filler debris (per FRSA 3.06)
- Step or Pan Flashing at every roof-to-wall junction, especially around stucco, chimneys, or parapets [R903.2.1]
- Stucco Stop / Casing Bead Flashing installed where roofing meets wall finishes to prevent water wicking up behind stucco
- Valley Flashing in all open valleys; and proper underlayment with metal in closed valleys
- Counter Flashing above headwalls and chimney aprons to overlap base flashing
Red Flags:
- No visible metal in valleys or wall transitions
- Mortar smeared over missing drip edge or valley metal
- Trim lock set on broken tile shards or 2×4 scraps rather than proper riser metal
Homeowner Tip: If you can’t see visible flashing at key areas, ask your contractor for in-progress photos. Don’t assume it’s there.
5. Vents Must Be Designed for Tile Roofing
Code References: FBC-R R903.4, R903.2.1, R904.1
Ventilation is critical, especially in Florida’s humid climate. But not all vents are created equal. Roofers sometimes install standard shingle-style vents on tile roofs, which don’t sit high enough and end up causing leaks.
Tile-compatible vents are designed with elevated flanges and saddle flashings to match the height and flow pattern of tile.
What to Look For:
- Raised tile-compatible vents (e.g., O’Hagin or similar)
- Flashing that diverts water around the vent, not behind it
- Proper mortar bedding or diverter pans, not a dam of cement
Red Flags:
- Mushroom-style vents meant for shingle roofs
- Mortar piled up behind a vent to try and “redirect” water
- Vents flush with the deck — they should sit above the tile plane
6. Ridge and Hip Materials: No Shortcuts Allowed

Code Reference: FBC-R 904.1, FRSA/TRI §3.06
The ridges and hips of your roof must be reinforced with the right materials — not just stacked tile on thin mortar. Florida code and the FRSA/TRI manual specify that ridge tiles must sit on properly sized and fastened wood or metal risers and be secured with approved adhesive foam or continuous mortar bedding.
Bad Practices to Avoid:
- Using broken tile shards or scrap wood instead of proper risers
- Point-loaded mortar globs rather than a continuous bed
- Hollow mortar beds that break down within a year or two
Best Practice: Install a continuous, code-approved support (usually a metal riser) followed by foam or mortar, and then set each ridge tile with proper alignment and spacing.
7. The 25% Rule: Partial Replacements Can Trigger Full Code Upgrade
Code Reference: Florida Existing Building Code 706.1.1
If more than 25% of your roof is replaced in a 12-month period, the entire roof must be brought up to current Florida Building Code. This catches a lot of people by surprise — especially during real estate transactions or when insurance is involved.
What That Means: If your roofer says they can just “repair” 30% of your tile surface without upgrading underlayment, flashing, or other components, they’re either uninformed or trying to cut corners.
Homeowner Tip: Document the square footage of any repairs or replacements and keep it on file in case your insurance or building department needs it.
Final Tips to Protect Yourself From Code Violations
Even if you trust your roofer, it pays to stay involved. Here’s how to make sure your roof is built to last:
- Ask for product approval numbers. Every material should have a Florida Product Approval number (FL#), showing it’s certified for use in our state.
- Request in-progress photos, especially of underlayment and flashing. Don’t wait for the final “after” pictures — the real work happens before the tile goes on.
- Verify flashing at every wall, transition, and valley. These are the first places to fail.
- Get a third-party inspection if you’re unsure. This is especially wise if you’re buying or selling the home, or if the contractor is unfamiliar to you.
Need Help?
At Salvo & Sons Roofing, we’ve built our name on doing things by the book. We don’t cut corners, we don’t skip steps, and we document every part of the process.
If you’re planning a tile roof replacement, or if something doesn’t look right on your current roof, reach out. We’ll give you an honest assessment and help you protect your investment — and your home.